Walking Through Phone Troubleshooting Before Paying for an Emergency Dispatch
Trust Allred
When your furnace fails on a freezing weekend morning, the panic sets in. Before booking an emergency service call, check these simple steps to safely restore your heat.
The Panic of a Sudden HVAC Failure on a Weekend
Walking Through Phone Troubleshooting Before Paying for an Emergency Dispatch is often the last thing on your mind when your system fails unexpectedly, but it is the absolute best way to save time and unnecessary stress. The sudden silence from your vents when your house is rapidly losing heat creates an immediate sense of panic. You realize the equipment has stopped running, the temperature is dropping, and you are facing a major disruption to your day.
When our dispatchers answer the phone on freezing winter weekend mornings, we hear that immediate anxiety in a homeowner's voice. The natural reaction is to request a technician as fast as humanly possible. You are faced with a rapid decision: do you immediately book a potentially costly weekend service call, or do you take five minutes to check the basics first?
We handle both heating and air conditioning systems, and we know that this panic is universal whether the temperature outside is zero degrees or pushing triple digits. However, a significant percentage of these frantic calls do not actually require a licensed technician to pull into your driveway. Many sudden failures are caused by minor interruptions that can be resolved safely and quickly over the phone. We want to guide you through that exact process.
Why We Actively Try to Prevent Unnecessary Emergency Calls
The standard industry response to a frantic weekend phone call is simply to book the appointment, dispatch the truck, and collect the emergency fee. When you call us, you will experience a completely different business methodology. Our dispatchers are trained to actively try to talk customers out of unnecessary emergency dispatches before putting a technician on the schedule.
This commitment is a core part of our customer-first approach. We operate with the belief that we would rather lose out on an emergency dispatch fee today if it means saving you money and building a foundation of long-term trust. When we keep a technician free by solving a simple battery issue over the phone, that technician remains available for a family facing a true, dangerous mechanical emergency.
On busy winter weekend mornings, the sheer volume of calls we receive often includes highly preventable issues. A tripped breaker, a bumped switch, or a clogged filter can easily mimic a catastrophic system failure. If we can help you identify and fix one of these minor issues over the phone for free, we consider that a massive win for everyone involved.
To give you a look behind the curtain, we are sharing the exact pre-dispatch checklist our team uses every single day. These are the safe, homeowner-friendly steps we will ask you to perform before we ever send a truck to your home.
Step 1: Diagnosing a Blank Thermostat Screen
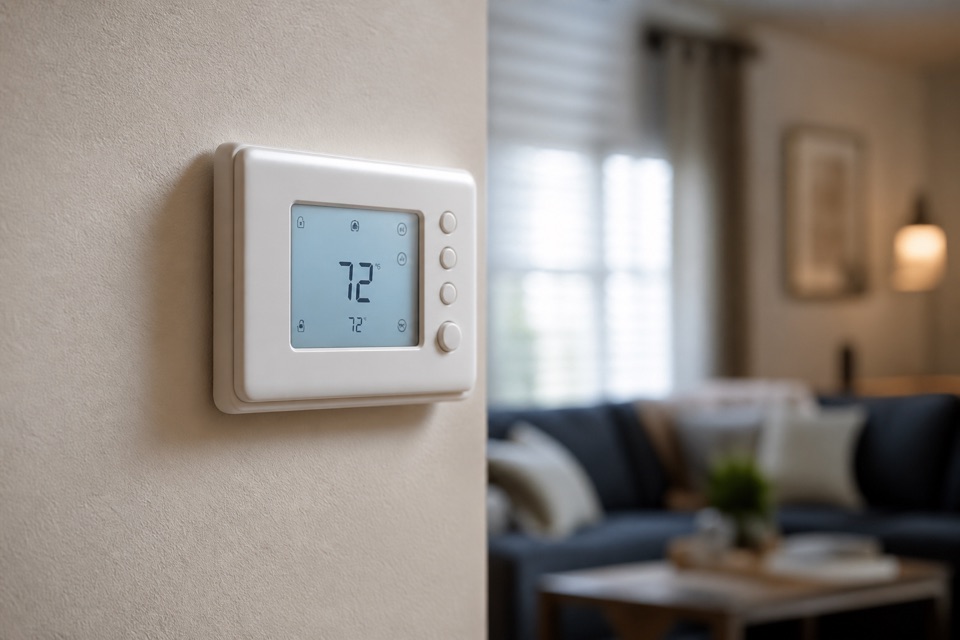
The very first question our dispatchers will ask you is always about the status of your thermostat. The thermostat acts as the brain of your entire heating and cooling setup. If the brain cannot communicate with the equipment, the system will not run. A blank thermostat screen is the most common culprit behind a system that appears completely dead.
| Thermostat Symptom | Common Underlying Cause | Safe Homeowner Action |
|---|---|---|
| Completely blank display | Dead batteries or power loss | Replace batteries and check the breaker panel |
| Screen is on, but no air blows | System delay timer engaged | Wait 5 to 10 minutes for the safety delay to clear |
| Temperature reading is inaccurate | Drafts or direct sunlight on the unit | Ensure the thermostat is not exposed to open windows |
If you are staring at a blank screen, follow these specific steps to safely troubleshoot the device:
- Check the display for any signs of life: If there are no numbers or backlights visible, the system is simply not receiving the command to turn on.
- Replace the internal batteries: Many homeowners do not realize their thermostat relies on standard AA or AAA batteries to function. Gently pull the faceplate off the wall mount and swap out the old batteries for a fresh set.
- Verify the mode and temperature setpoint: Once the screen is active, ensure the system is explicitly set to "Heat" (or "Cool" in the summer). Check that the temperature setpoint is actually calling for the system to run—meaning it is set higher than the current room temperature for heating.
- Wait for the safety delay: After replacing batteries, modern thermostats often enter a five-minute delay period to protect the compressor from short-cycling. Give it a few minutes before assuming the fix failed.
If you install fresh batteries and the screen remains completely blank, it could indicate a blown fuse on the indoor control board or a tripped internal safety switch. Because investigating internal fuses requires opening the equipment cabinet and exposing yourself to high voltage, this is the point where our dispatchers will advise that a professional technician is required.
Step 2: Checking the Breaker Box and Power Switches
If the thermostat is fully operational but the equipment remains unresponsive, the next logical step is to verify that power is actually reaching the unit. Power interruptions happen frequently, especially when severe weather rolls through the region.
Pacific Northwest weather shifts often feature a rapid drop from mild, manageable temperatures to sudden freezing conditions. These abrupt changes force your standard residential furnace to overwork as it struggles to catch up to the thermostat setting. This sudden spike in electrical demand can occasionally cause the system to draw too much amperage and trip a circuit breaker.
Here are the specific power components we will ask you to check:
- The main electrical panel: Locate your home's primary breaker box. Look down the rows for the switch labeled for your HVAC system or furnace. Keep in mind that a tripped breaker will not always flip completely to the "Off" side; it usually rests slightly out of alignment in the middle.
- The safe reset procedure: If you find a tripped breaker, you must turn it completely to the "Off" position until you feel a firm click. Only then should you push it firmly back to the "On" position. The critical warning: If the breaker immediately trips again, stop touching it. A repeatedly tripping breaker indicates a serious electrical short, and forcing it on can cause a fire.
- The physical furnace switch: Walk over to your indoor equipment. You will usually find a standard light switch mounted on the side of the standard residential furnace or on the wall immediately next to it. This acts as an emergency shut-off. Because it looks just like a light switch, it is incredibly easy for someone to bump it to the "Off" position while moving boxes in the garage or pulling down holiday decorations from the attic.
Our dispatchers will always explicitly warn you never to open the metal equipment cabinet or attempt any internal electrical repairs. Checking the breaker panel and the external wall switch is perfectly safe, but touching anything behind the service panels requires a professional license.
Step 3: Inspecting the Air Filter on Your Standard Residential Furnace
Restricted airflow is the silent killer of modern HVAC systems. It is consistently one of the leading causes of emergency service calls we receive, yet it is entirely preventable. When air cannot move freely through your system, it triggers a chain reaction of mechanical failures.
A severely clogged air filter acts like a solid brick wall inside your ductwork. Your standard residential furnace relies on a steady intake of cold return air to wash over the heat exchanger and carry the warmth into your living space. When the filter is choked with dust, pet hair, and debris, that cold air cannot get through. Consequently, the internal temperature of the furnace spikes dangerously high.
When this happens, a built-in safety mechanism called the limit switch activates. The limit switch monitors the internal temperature of the furnace cabinet. If it detects that the system is overheating due to restricted airflow, it will immediately shut the burners off to prevent a fire or a cracked heat exchanger. You might notice the system turning on for just a few minutes before abruptly shutting down—a symptom known as short-cycling.
This exact same airflow issue causes severe problems in the summer. Without warm air blowing over the indoor evaporator coil, the condensation on the coil freezes. Within hours, the coil transforms into a solid block of ice, completely halting the air conditioning process.
Before we dispatch a truck, we will ask you to safely locate your filter rack, slide the filter out, and hold it up to a light source. If you cannot see light shining through the pleated material, the filter is severely restricted. We will instruct you to install a fresh, clean filter, wait a few minutes, and see if the system resets and resumes normal operation.
Step 4: Ensuring Proper Airflow and Vent Clearance
The final safe check our dispatchers will walk you through involves the airflow dynamics inside your living space. Sometimes, the mechanical equipment in the garage or attic is working perfectly, but the conditioned air simply cannot reach the rooms where you need it most.
We will instruct you to take a quick walk through every room in your house. You need to verify that all supply registers (the vents where conditioned air blows out) and return grilles (the larger vents where air is pulled back into the system) are fully open and completely unobstructed.
It is incredibly common for a heavy rug, a newly placed sofa, or even a dropped pile of laundry to completely cover a floor vent. Many homeowners also intentionally close vents in unused guest rooms, believing it will save energy. In reality, modern ductwork is precisely balanced. Closing vents increases the static pressure inside the system, forcing the blower motor to fight against severe resistance, which leads to the exact same overheating issues caused by a dirty filter.
Blocked vents can perfectly mimic a total system failure. You might be staring at a blank thermostat screen or shivering in a cold room, assuming the blower motor has died, when the only issue is a blocked return vent starving the system of air. Verifying your vent clearances ensures the system can breathe.
These four steps—checking the thermostat, resetting the power, replacing the filter, and clearing the vents—represent the absolute limit of safe DIY troubleshooting. If you have completed this checklist and the house is still uncomfortable, you have done everything you safely can.

When Phone Troubleshooting Isn't Enough
While we love it when winter weekend mornings end with a simple filter swap or a flipped breaker, we know that some issues absolutely require a licensed professional. Unexpected summer heatwaves or brutal winter cold snaps make a sudden failure feel like an immediate emergency, which is exactly why fast, honest dispatching matters so much to our team.
One local family reached out to us during a harsh winter cold snap because their standard residential furnace had been overheating and shutting off after just a single heating cycle. This had been an ongoing intermittent issue, but with premature newborn twins in the house requiring a perfectly stable and comfortable environment, it instantly became an urgent situation. Our dispatcher walked them through the phone troubleshooting steps, but it quickly became clear that the airflow and power were fine—the issue was a mechanical failure inside the cabinet.
We dispatched a technician to the home immediately. He thoroughly inspected the system and diagnosed a failing limiter switch that was incorrectly reading the internal temperature and forcing the system to shut down prematurely. He replaced the part efficiently to resolve the mechanical fault, restoring safe, reliable heat for the newborns and giving the family immediate peace of mind.
If the pre-dispatch checklist fails to start your system, an emergency dispatch fee is entirely justified because you know the basic, safe options have already been exhausted. You are not paying a technician to flip a light switch; you are paying for their advanced diagnostic expertise. Furthermore, keeping up with routine maintenance and tune-ups is the best way to catch these failing components before they turn into a weekend crisis.
Frequently Asked Questions About Pre-Dispatch HVAC Checks
What should I check before calling an HVAC technician?
Before scheduling a repair, you should check your thermostat batteries, the electrical breaker, the furnace power switch, and your air filter. These four simple steps resolve a surprisingly large percentage of emergency calls. Our dispatchers also recommend verifying that your supply and return vents are open and unobstructed. If these safe, basic checks do not restore your system's operation, it is time to call a professional technician.
Why is my thermostat screen blank?
A blank thermostat screen usually means the unit has lost power due to dead batteries or a tripped circuit breaker in your main electrical panel. It can also indicate that a safety switch inside your standard residential furnace has tripped, or an internal fuse on the control board has blown. Try replacing the AA or AAA batteries first. If the screen remains blank after fresh batteries are installed, you will need a technician to diagnose the electrical interruption.
How do I reset my HVAC system safely?
You can safely reset your system by turning it off at the thermostat, checking your main electrical panel for a tripped breaker, and flipping that breaker completely off and then firmly back on. You can also toggle the physical power switch located next to the indoor unit. You must never open the equipment panels to reset internal safety switches, as this exposes you to dangerous high voltage and moving parts.
What constitutes a true HVAC emergency?
A true HVAC emergency involves severe weather conditions, safety risks, or vulnerable household members who cannot tolerate extreme indoor temperatures. For example, a sudden failure during a freezing winter weekend morning or a record-breaking summer heatwave is considered an emergency. Suspected carbon monoxide leaks, electrical burning smells, or sparks also require immediate, emergency professional intervention and should never be ignored.
Can a dirty filter cause my system to stop working completely?
Yes, a severely clogged air filter can completely shut down your standard residential furnace or air conditioner. The restricted airflow causes the heat exchanger to overheat, which triggers a limit switch to turn the system off to prevent a fire. In cooling mode, a dirty filter causes the indoor evaporator coil to freeze solid into a block of ice, stopping all conditioned air from reaching your home until the system thaws.
Make the Right Call for Your Home's Comfort
Dealing with a sudden mechanical failure is stressful, but a clear, safe, and easy-to-follow checklist of things you can check yourself can often restore your home's heat without the need for a technician. We want you to feel confident walking through these steps. Checking your thermostat, verifying your power supply, and inspecting your filters are excellent habits that protect your equipment and save you money.
However, if your standard residential furnace or AC unit still refuses to start after you have completed the basic troubleshooting checklist, you can rest easy knowing you did everything you safely could. When the simple fixes are ruled out, our team is standing by to provide the high-level diagnostics your system needs.
Do not hesitate to reach out for professional emergency repair services when phone troubleshooting is not enough to bring your system back to life. We are ready to restore your comfort safely, honestly, and efficiently.
Ready to Get Started?
Whether you need a repair, maintenance, or a new installation, our expert team is here to help.